Comment recoller un flocage sur un maillot de foot: why sweat and improper washing damage your kit’s numbers
There is nothing quite as disheartening as pulling your favourite football shirt out of the wardrobe only to discover the flocking has started to lift. Whether it is a cherished replica from a memorable season or a treasured match-worn shirt, those peeling letters and numbers can leave you feeling a bit deflated. The good news is that with a few household items and a bit of careful attention, you can restore your kit to its former glory and extend its life considerably.
Understanding why your shirt's flocking starts to peel
Before diving into the repair process, it is worth understanding what causes flocking to lose its grip in the first place. Heat-sealed numbers and letters are designed to bond with the fabric using a special adhesive that reacts to high temperatures. Over time, however, this bond can weaken due to a combination of factors, leaving you with an unsightly peeling shirt.
The Impact of Sweat and Body Oils on Heat-Sealed Numbers
When you wear your football shirt during a match or training session, sweat and body oils inevitably seep into the fabric. These natural substances can gradually break down the adhesive that holds the flocking in place. The moisture from perspiration, combined with the salt and oils your skin produces, creates an environment that weakens the bond between the flocking and the shirt. Over time, this repeated exposure can cause the edges of the letters and numbers to lift, particularly around areas that experience the most contact with your skin. Even if you are not wearing the shirt for sport and simply have it on as casual wear, the same issues can arise. The accumulation of these elements means that the flocking is constantly under assault, which is why even a well-loved replica can start to show signs of wear after a few seasons.
How incorrect washing techniques accelerate flocking damage
Beyond the effects of sweat and body oils, the way you wash your football shirt plays a significant role in the longevity of the flocking. Many people make the mistake of tossing their kit into the washing machine without giving it a second thought, but this can be a recipe for disaster. Using water that is too hot can cause the adhesive to soften and lose its effectiveness, while the agitation of the wash cycle can physically stress the flocking, causing it to lift and peel. Tumble drying is another common culprit. The intense heat and tumbling action can be particularly harsh on heat-sealed numbers, accelerating the breakdown of the adhesive. Additionally, using harsh detergents or fabric softeners can leave residues that interfere with the bond between the flocking and the fabric. Even something as seemingly innocuous as washing the shirt right-side out can lead to increased friction against other garments, which further contributes to peeling. Taking a more thoughtful approach to washing your kit can make a world of difference in preserving those important details.
Essential Tools and Materials for Reattaching Your Shirt's Flocking
Once you have identified the problem and understand what went wrong, the next step is to gather everything you need to carry out the repair. The beauty of this process is that you do not need any specialised equipment or expensive materials. Most of what is required can be found in your home already, making this a straightforward and cost-effective solution.
Household Items You'll Need for a Proper Repair Job
To get started, you will need your football shirt with the peeling flocking, a household iron, greaseproof paper or baking paper, a thin tea towel or clean cotton cloth, and a flat, stable surface such as an ironing board. The iron is the key tool here, as it provides the heat necessary to reactivate the adhesive on the back of the flocking. Greaseproof paper acts as a protective barrier, preventing the iron from coming into direct contact with the flocking and potentially scorching it or the fabric of the shirt. A tea towel or cotton cloth serves a similar purpose during the final pressing stage, adding an extra layer of protection while ensuring even pressure is applied. The ironing board provides a firm, heat-resistant surface that allows you to work comfortably and effectively. If you do not have an ironing board, a clean, flat table covered with a towel can work as a substitute, though you will need to take extra care to avoid damaging the surface underneath.
Preparing Your Workspace and Shirt for the Re-bonding Process
Preparation is crucial for achieving a successful repair. Start by laying your shirt flat on the ironing board, ensuring the area with the loose flocking is easily accessible and free from any creases or folds. Give the shirt a quick inspection to make sure it is clean, as any dirt, grime, or residue can interfere with the re-bonding process. If the shirt needs a wash, do so before attempting the repair, and allow it to dry completely. Once the shirt is clean and dry, carefully position the peeling letters or numbers back into their original spots. Take your time with this step, as accuracy is important for a professional-looking result. If the flocking has curled or warped, gently flatten it with your fingers. Having everything in place before you start applying heat will make the process smoother and reduce the risk of misalignment or further damage.
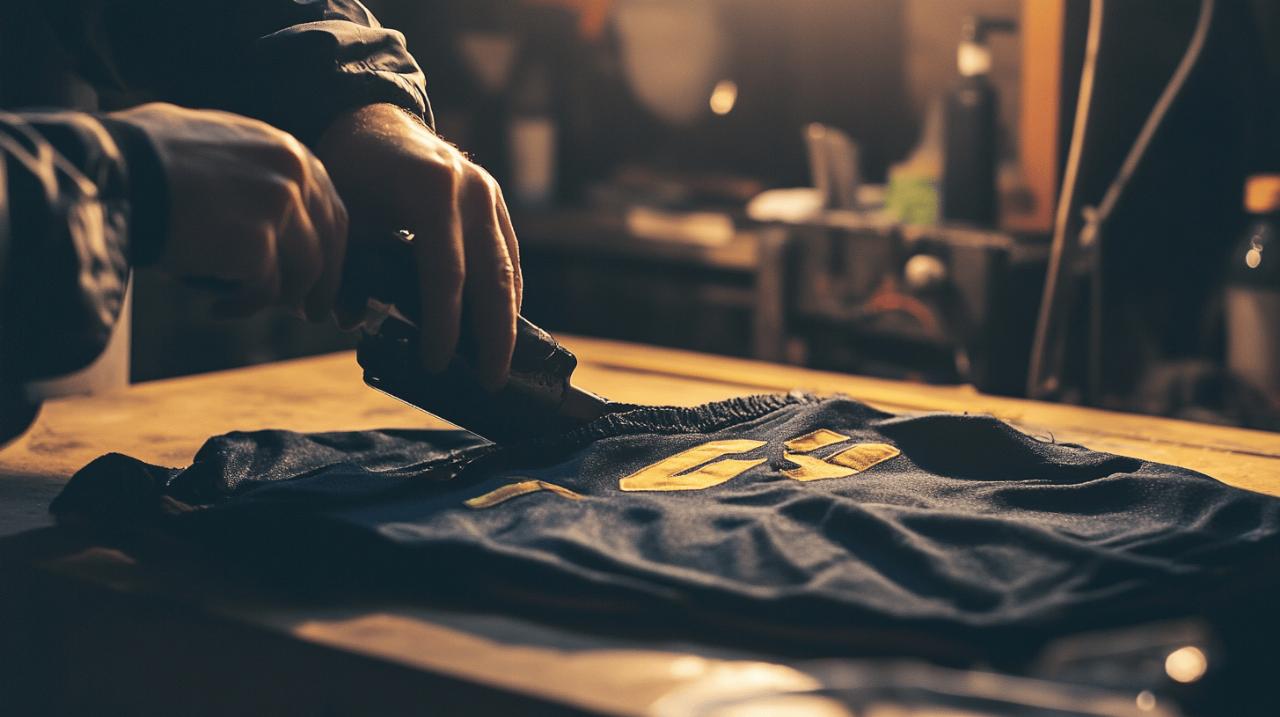
Step-by-step method to successfully re-attach peeling flocking
 With your workspace prepared and your materials at hand, you are ready to begin the repair process. This method relies on reactivating the heat-sensitive adhesive on the back of the flocking, allowing it to bond once again with the fabric of your shirt. By following these steps carefully, you can achieve a long-lasting repair that will have your kit looking smart in no time.
Proper Ironing Techniques and Temperature Settings for Different Fabrics
Begin by placing a piece of greaseproof paper over the flocking, ensuring it fully covers the area you will be working on. This protective layer is essential, as it prevents the iron from scorching the flocking or leaving shiny marks on the fabric. Set your iron to a medium heat setting and turn off the steam function. Steam can introduce unwanted moisture, which can interfere with the adhesive and the fabric. Gently press the iron onto the greaseproof paper, moving it in small, circular motions to distribute the heat evenly. Apply steady, even pressure and keep the iron moving for around twenty to thirty seconds. It is important not to leave the iron sitting in one spot for too long, as this can cause the fabric to burn or the flocking to melt. The goal is to generate enough heat to soften and reactivate the adhesive without causing any damage. Different fabrics may respond differently to heat, so if your shirt is made from a delicate or unusual material, consider testing the process on a small, inconspicuous area first. Most modern football shirts are made from polyester or similar synthetics, which generally tolerate this method well, but it is always better to err on the side of caution.
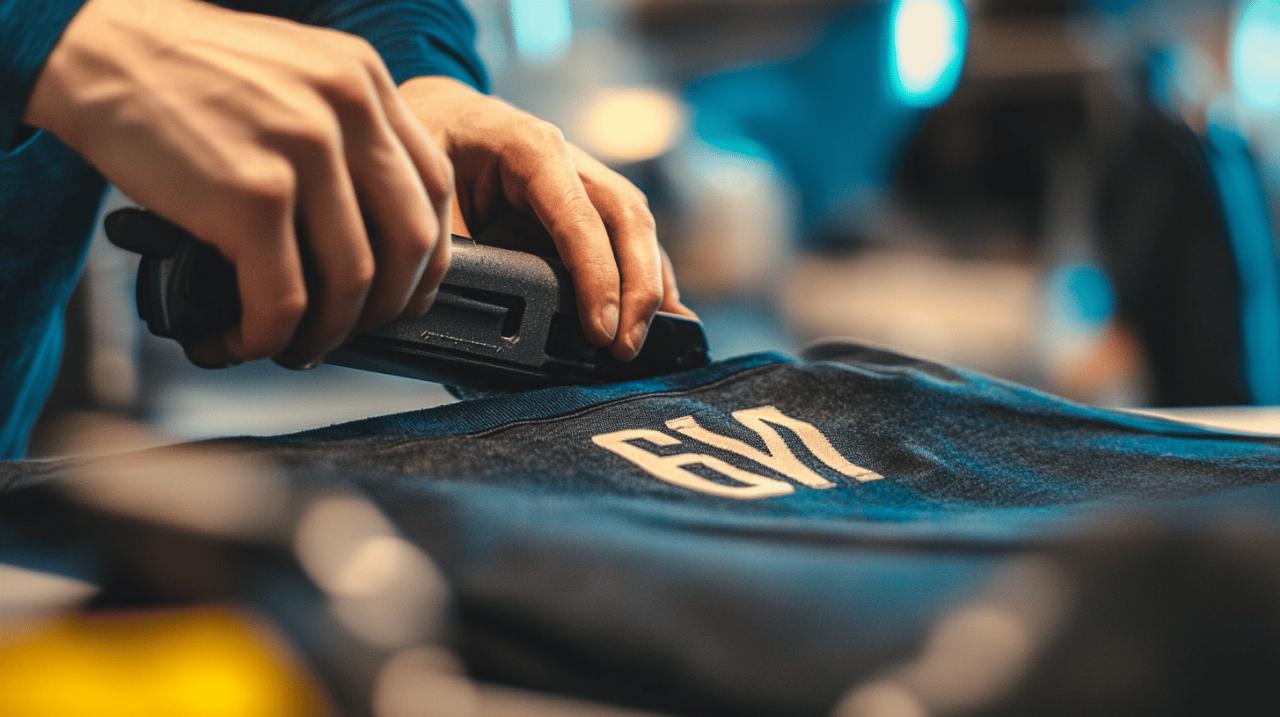
The Cooling and Final Pressing Process for a Long-Lasting Bond
Once you have applied heat to the flocking, remove the iron and allow the area to cool down completely. This cooling period is vital, as the adhesive needs time to set and form a strong bond with the fabric. Do not rush this step, as moving the shirt or attempting to peel back the flocking too soon can undo all your hard work. After the area has cooled, remove the greaseproof paper and inspect the flocking. If it appears to be secure, place the tea towel or cotton cloth over the area and give it another press with the iron for ten to fifteen seconds. This final pressing adds an extra bit of heat and pressure, which helps to reinforce the bond and ensure the flocking is firmly attached. Carefully peel back a corner of the flocking to check if it is properly re-attached. If it still feels loose, repeat the process, adjusting the heat or pressure slightly as needed. It may take a couple of attempts to get it just right, but with patience and attention to detail, you should achieve a solid, lasting repair.
Preserving your football shirt: best washing and care practices
Once you have successfully re-attached the flocking, the next step is to ensure it stays in place for as long as possible. Proper care and maintenance are essential for preserving the appearance and integrity of your football shirt, and a few simple changes to your washing routine can make a significant difference.
Correct washing methods to prevent future flocking damage
The most important rule for washing your football shirt is to always turn it inside out before placing it in the washing machine. This simple step protects the flocking from the friction and agitation that can occur during the wash cycle. Use a cool wash, ideally at thirty degrees Celsius or lower, as higher temperatures can weaken the adhesive and cause the flocking to peel once again. Opt for a gentle or delicate cycle, which is less harsh on the fabric and the flocking. When it comes to detergent, choose a mild, non-biological option and avoid using fabric softeners, as these can leave residues that interfere with the bond. After the wash is complete, remove the shirt promptly and avoid leaving it sitting in the machine, as this can cause creases and put unnecessary stress on the flocking. Instead of using a tumble dryer, which can subject the shirt to intense heat and mechanical stress, allow it to air dry naturally. Hang the shirt on a washing line or lay it flat on a clean surface, ensuring it is out of direct sunlight, which can cause colours to fade.
Long-term maintenance tips to keep your kit looking smart
Beyond washing, there are several other practices you can adopt to keep your football shirt in top condition. Store your shirt in a cool, dry place, away from direct sunlight and heat sources, which can degrade both the fabric and the flocking over time. If you are storing the shirt for an extended period, consider placing it in a garment bag to protect it from dust and moisture. When wearing the shirt, be mindful of activities that could cause excessive sweating or strain on the fabric, and if possible, rinse it with cold water after each wear to remove sweat and oils before they have a chance to break down the adhesive. Regularly inspect the flocking for signs of lifting or peeling, and address any issues promptly using the repair method outlined earlier. By taking a proactive approach to care and maintenance, you can ensure your cherished football shirt remains a source of pride and enjoyment for many years to come.